How to Make Shear Blade Gap Adjustment?
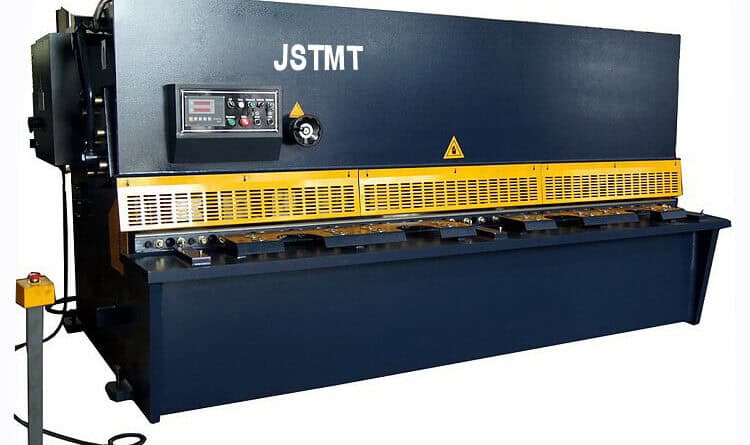
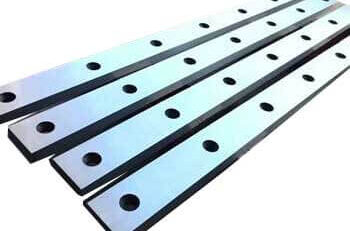
Plate shears are usually used to cut metal sheets for metalworking industry. Shear blade gap adjustment is an important process to ensure precise cutting. The sheet metal shearing operations are performed by the action of the two Cutting blades. They eliminate stress through vibration aging with good rigidity and stability. Incorrect clearance is the main cause of chipped blades. Ensure your machine is equipped with premium Guillotine Shear Blades that hold their edge longer.”
What is a shear blade gap? The shear blade gap is the distance between the upper and lower blades of the shear as they pass each other during the shearing process. It’s the key point to produce a quality cutting and keep the shear to work in good condition. Improper shear blade gap adjustment will impact power consumption and terminate cuts.
How to adjust the shear blade gaps or change the cutting blades to fit different sheet metal cutting materials and thicknesses.
Why Material Matters: Mild Steel vs. Stainless Steel Clearance
When adjusting the blade gap on a guillotine or swing beam shear, you cannot use a “one size fits all” setting. The tensile strength and hardness of the material dictate the precise clearance required to achieve a clean, square cut without burrs.
Here is the technical comparison between the two most common materials:
1) Mild Steel (Carbon Steel)
For standard carbon steel (like A36 or S235), the material is relatively soft and ductile. It shears easily with standard settings.
- The Rule: The standard clearance is usually 5% to 10% of the plate thickness.
- Example: If you are cutting a 6mm mild steel plate, the gap should be set between 0.3mm and 0.6mm.
- Result: A correct gap allows for a clean fracture after about 1/3rd of the material thickness is penetrated.
2) Stainless Steel (The Challenge)
Stainless steel (like 304 or 316 series) presents a much harder challenge. It has a significantly higher tensile strength and tends to “work harden” during the cut.
- The Rule: Because stainless is harder, it requires a tighter, more precise clearance to prevent the material from folding over (burring). However, setting the gap too tight increases the friction and wear on the blades.
- The Danger: Using standard material blades (like 6CrW2Si) on stainless steel often results in chipped edges because the steel is too brittle for the impact.
- The Solution: For stainless applications, it is mandatory to use High-Carbon High-Chrome H13 Blades. This material is heat-treated to resist the high impact and abrasion of stainless steel, preventing chipping and extending the life of your machine.
Quick Reference Gap Chart
| Material Thickness (mm) | Mild Steel Gap (mm) | Stainless Steel Gap (mm) |
| 1.0 mm | 0.06 | 0.05 |
| 2.0 mm | 0.15 | 0.10 |
| 4.0 mm | 0.35 | 0.25 |
| 6.0 mm | 0.60 | 0.45 |
| 10.0 mm | 1.00 | 0.80 |


1. Adjust the shear blade clearance according to the die cutting clearance value
As we all know, the cutting clearance is generally 6~8% of the material thickness (the bilateral clearance is 1.00 mm thick). The shear blade gap can be half of the bilateral gap value, which is 3~4% of the material thickness.
Due to the structure of plate shears, the blade gap can be smaller, so that the burr of the cutting material is smaller.

2 Check the plate shears to see if you need to change the knife or adjust the knife gap
Before adjusting the shear blade clearance, we should see whether the equipment status is for tool change and maintenance. In the case of adjustment from the beginning, it needs to be adjusted step by step.
3. Steps of Shear Blade Gap adjustment
The following steps are for shear blade gap adjustment as below:
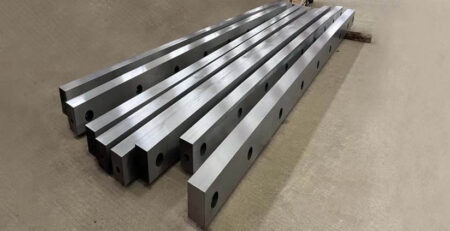
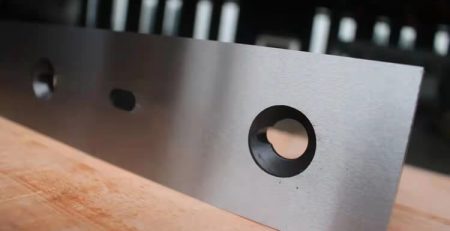
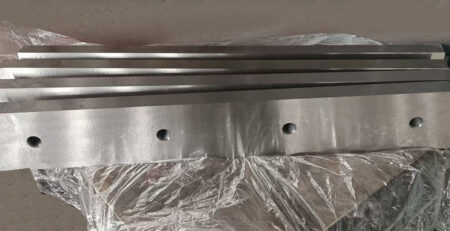
1.) Remove the bottom blade and clean it one by one.
2.) The blades can be used on four sides, and the selected side shall be tight to install. Please check the straightness of the blade in both horizontal and vertical directions.
3.) The upper blade is fixed, which cannot be adjusted. Instead, we make the shear blade gap adjustment on the lower blade.
4.) Find out the left and right screws of the lower blade to increase the gap at the outermost side.
5.) Find out the left and right screws of the lower blade to narrow the gap. and There are locking backup nuts on the inside.
6.) Loosen the left and right 4 bolts on the table.

7.) The manual turning gear will lower the top blade to the proper position, and the operator is ready for the shear blade gap adjustment.
8.) Use a feeler gauge to roughly adjust to 0.5 mm from where the upper and lower blades of the left hand are not engaged.
9.) Manually turn to move the blade up to the middle position and roughly adjust it to 0.5 mm.
10.) Manually turn to move the blade up to the position where the upper and lower knives are not disengaged on the right, and roughly adjust the middle position to 0.5mm.
11.) Manually turn the upper blade to the proper position for fine adjustment.
12.) Use the feeler gauge to fine-adjust the upper and lower blade of the left hand from the part that is not occluded, until the three threads can be inserted and the five threads cannot reach.
13.) Manually turn to move the blade up to the middle position and start fine adjustment until three wires of the feeler gauge can enter five wires not reach.
14.) Manually turn the tool to move the blade up to the position where the upper and lower knives on the right are not disengaged, and start fine adjustment until three wires of the feeler gauge can be inserted, and five wires cannot be inserted.
15.) The above is for the new shear, and the feeler gauge can be adjusted until three wires can be inserted and five wires cannot be inserted.
16.) In the case of the old machine, adjust the feeler gauge carefully until ten wires can enter twenty wires. Or make appropriate adjustments according to 1/10-1/20 of the required shear sheet metal thickness.
17.) When the cutting edge of the plate shearer is sharp, if there is a burr on the edge of the cut plate, the gap between the upper and lower blades can be appropriately reduced.

Even with the perfect gap adjustment, you might still experience blade chipping if you are cutting the wrong material with the wrong blade.
Most standard shearing machines come with 6CrW2Si blades. These are excellent for mild steel (Carbon Steel) but are often too brittle for stainless steel.
Why H13 prevents chipping:
Stainless steel has a high tensile strength and “work hardens” as it is cut. When a standard blade hits this hard material, the shock can cause the edge to microscopic crack or chip.
For cutting Stainless Steel (especially 3mm to 6mm thickness), we recommend upgrading to High-Carbon High-Chrome H13 Shear Blades.
- Toughness: H13 is a hot-work tool steel that absorbs impact better than standard alloy steel.
- Wear Resistance: It holds a sharp edge 3x longer, reducing the frequency of gap adjustments.
- Cost Efficiency: While H13 costs more upfront, it prevents the downtime caused by chipped or dull blades.


Comment (1)
Thank you for explaining the shear blade gap adjustment. It’s a good thing that keeping a record of adjustments and regular maintenance can extend the machine’s life.